


When it comes to faulty electronics, root-cause analysis is your best friend. Root-cause analysis is a process that helps you identify and correct the causes of problems. You want to find out why something went wrong so you can prevent it from happening again.
The main goal of the root-cause analysis is to identify the true sources of a problem. Once you know which factors are causing the issue, you can take action to address them. To practice root-cause analysis effectively, you need to have a good understanding of the problem and its causes. You also need to have a method for tracking and measuring results. Root-cause analysis is often used in business settings, especially in cases where goods or services are not meeting customer expectations.
Root-cause analysis is a powerful problem-solving tool that can be used to prevent problems from occurring again. By identifying the root cause of a problem, businesses can take steps to address the issue and prevent it from happening again.

Benefits Of Using Root-Cause Analysis
There are many benefits of using root-cause analysis to solve problems. The main root-cause analysis benefits are:
- Identify problems early on.
- Prevent problems from occurring again.
- Improve customer satisfaction.
- Reduce costs associated with problem-solving.
Root-cause analysis is a key step in the quality control process and can save you the most headaches. But how do you go about finding the root cause of a problem? Here are some tips to consider.
First Steps
In order to conduct root-cause analysis, you first must identify all the factors that contribute to a problem. Once all the contributing factors have been identified, they can be analyzed to determine which factor is the primary cause of the problem. There are many techniques that can be used to analyze contributing factors, but some common ones include brainstorming sessions, fishbone diagrams, and 5 Whys analysis.
Once the root cause of a problem has been determined, steps can be taken to prevent it from occurring again. This might involve making changes to processes or procedures, providing training for employees, or investing in new technology or equipment. The best solution will depend on the specific problem that was being addressed.
First, you want to gather all the information you have about the defective product. This includes information about product design, the manufacturing process, test results, and customer feedback. Once you have all this information, it's time to figure out what went wrong. It’s helpful to be as specific as possible when identifying the problem. If you know which product has a flaw or defect, that's even better. The more specific you are, the easier it is to pinpoint the root cause. One of the best ways to correctly identify a problem and its root cause is to use the 5 Whys method. It is a simple but powerful tool that allows you to identify the problem clearly and concisely.
The Analysis
With all the information available to you, now it's time to analyze. Look for patterns or trends in the data you collect. Are there any defective products with the same problem? This is a surprisingly good indicator that the root cause is related to the manufacturing process or initial design. Remember that you may need to run experiments or simulations to confirm your results. You can use tools such as cause and effect diagrams, fishbone diagrams, and Pareto diagrams to find the root cause.
If you think you have found the root cause, it is important to evaluate and verify it. Make sure you don't jump to conclusions. And if you're sure what went wrong, take the steps to prevent it from happening again. This may mean changing the product design, manufacturing process, or quality control procedures. Again, using the 5 Whys method for this stage will be extremely helpful in identifying these changes if you get stuck.
Root-Cause and Electronics
There are a few basic steps that can be taken to help find a problem within an electronic assembly. The first step that can be taken is to go over each part looking for any signs of obvious damage such as a broken component or a loose wire. For example, if you can tell that there is a component that is damaged, such as a burnt-out resistor, a damaged trace on a printed circuit board, or a frayed wire that has come loose, it is clear what needs to be replaced within the assembly.
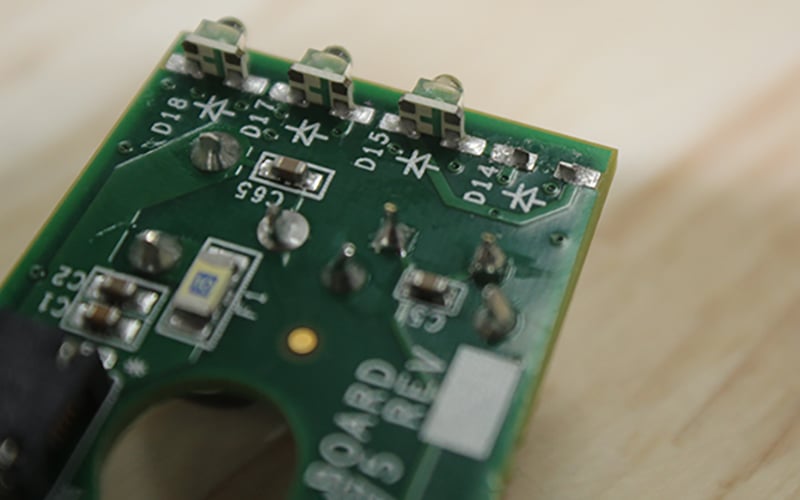
Failed component on a circuit board.
If you are not able to find anything damaged, it can next help to investigate whether all the proper connections are made. Often during shipping or rough handling, important connections can come loose and cause defects in a product. This could be a connector that has become disconnected or a wire that was soldered to the board that is no longer connected. To check for missed connections, you can use a multimeter on the continuity setting to go through the circuit making sure all the connections are made. It is helpful to have the circuit schematic at this stage of troubleshooting.
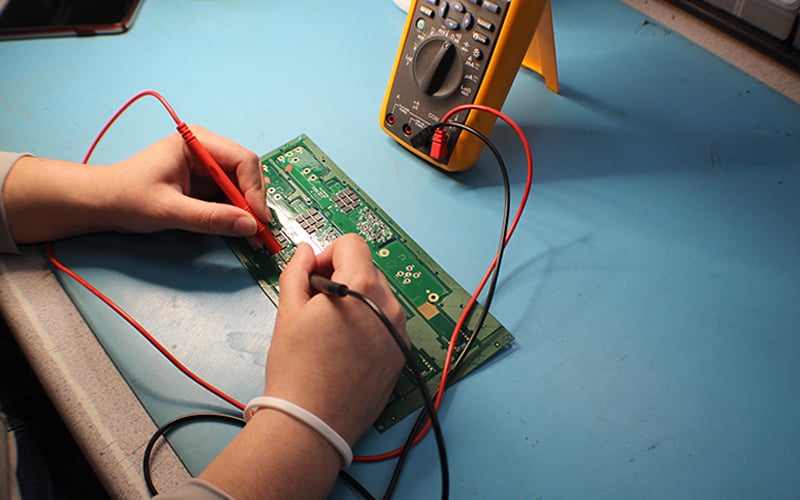
Testing a circuit board with a multimeter.
Along with checking the connections, it’s helpful to verify that the correct power is being applied to the circuit. Electrical assemblies are typically designed to only work with one power supply. If one was used that provided too much power, it’s possible there could be broken ICs or fuses that are no longer performing their intended tasks. Verify with the manufacturer’s specifications to make sure you are using the correct power supply and check for both the voltage, current, and connector polarity before ruling this out.
If the problem persists, you can try running diagnostic tests using lab equipment such as an oscilloscope or multimeter. If you are not satisfied with these tools or do not have the necessary technical knowledge, you can also refer to the user manual of the product or contact the manufacturer for help.
Summary
Root cause analysis means thoroughness, focus, and not being afraid to ask for help when you need it. By following these tips, you'll be well on your way to finding the root cause of the problem and minimizing defective products. There are many benefits to using root-cause analysis to solve problems. This method can help businesses identify potential issues early, preventing them from becoming bigger issues later on. Additionally, by understanding the root cause of a problem, businesses can take steps to make sure it doesn't happen again in the future. This can lead to increased customer satisfaction rates, as well as decreased costs associated with problem-solving.
Key Takeaways
- Root Cause Analysis Helps Prevent Recurring Issues: By identifying the true source of a problem rather than just treating symptoms, businesses can implement lasting solutions that reduce repeat failures and improve long-term product reliability.
- The 5 Whys Method Is a Valuable Diagnostic Tool: Asking “why?” multiple times helps isolate the fundamental cause of a defect. This simple technique, when used with accurate problem statements, improves clarity and guides effective corrective actions.
- Start With Specific, Measurable Problem Identification: Collect detailed data from product design, manufacturing, test results, and customer feedback to define the issue clearly. Specificity improves the accuracy of analysis and streamlines the investigation process.
- Visual Inspection and Electrical Testing Are Essential First Steps: Before diving into advanced diagnostics, inspect assemblies for physical damage, loose connections, and incorrect power input. Tools like multimeters and schematics can help pinpoint hardware issues early.
- RCA Drives Cost Reduction and Higher Customer Satisfaction: Effective root cause analysis not only solves current issues but also enhances product quality, reduces troubleshooting time and cost, and leads to better customer trust and satisfaction.


